
With bracelet organizer diy, you can easily create a functional and visually appealing solution for storing and organizing your bracelets. Whether you’re a jewelry enthusiast or simply want to keep your accessories neat and tangle-free, this DIY project offers a simple and effective way to showcase and protect your bracelets.
From choosing the right materials to customizing the design, this guide will provide you with all the necessary steps and inspiration to craft a unique and personalized bracelet organizer that meets your specific needs.
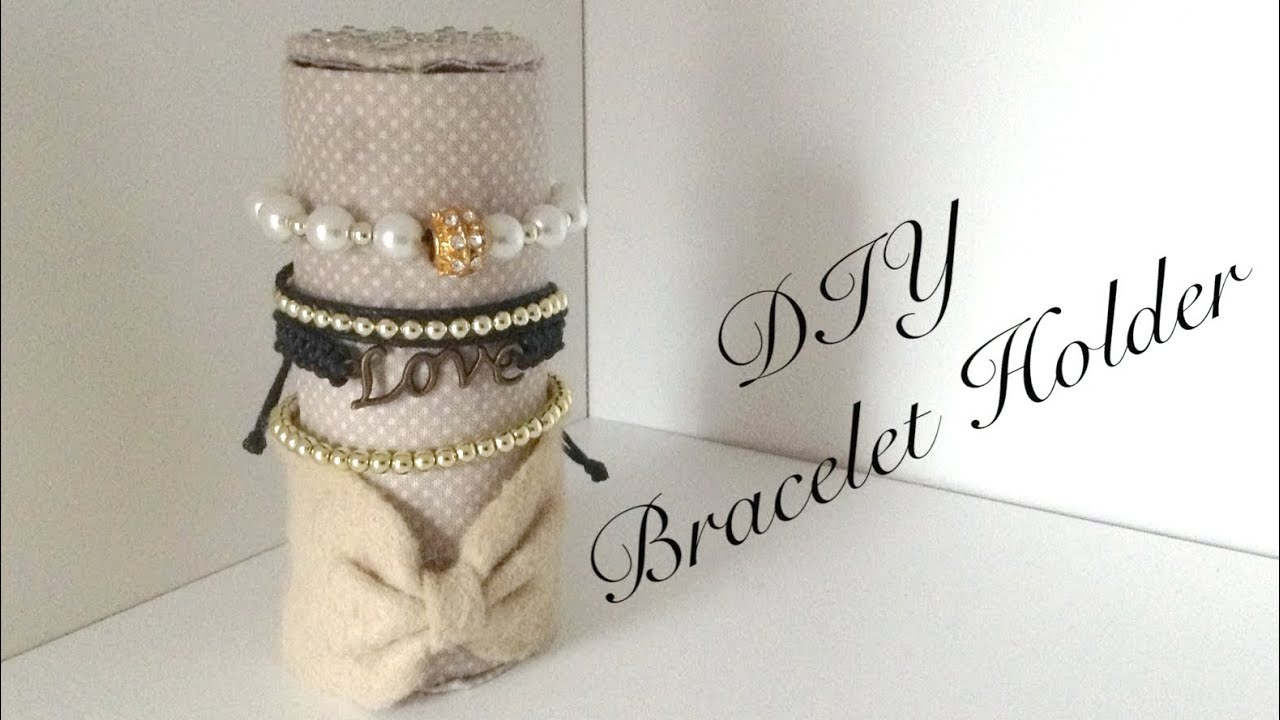
Bracelet Organizer DIY Overview

Creating a bracelet organizer is a practical solution for storing and organizing bracelets, preventing tangles and making it easy to find the desired piece. It offers several benefits, including space optimization, tangle prevention, easy accessibility, and aesthetic appeal.
Types of Bracelet Organizers
There are various types of bracelet organizers to suit different preferences and storage needs:
- Hanging Organizers:These organizers feature hooks or rods that allow bracelets to hang vertically, providing a clear view and easy access.
- Box Organizers:These organizers have compartments or dividers to separate bracelets, keeping them organized and protected.
- Roll Organizers:These organizers consist of a cylindrical shape with a zipper or button closure, allowing bracelets to be rolled up and stored compactly.
Materials and Tools Needed
The materials and tools required for a DIY bracelet organizer project may vary depending on the chosen design. However, some common materials include:
- Fabric or leather
- Scissors
- Needle and thread or sewing machine
- Hooks or rods (for hanging organizers)
- Compartments or dividers (for box organizers)
Materials and Tools
Selecting the right materials and tools is crucial for creating a durable and aesthetically pleasing bracelet organizer. Consider factors such as the number of bracelets you need to store, the desired level of protection, and the overall design aesthetic.
The following materials are commonly used in bracelet organizer DIY projects:
Fabric
- Velvet:Soft and luxurious, ideal for protecting delicate bracelets from scratches.
- Linen:Durable and breathable, suitable for everyday use and travel.
- Canvas:Sturdy and versatile, perfect for heavy-duty storage.
Cardboard
- Corrugated cardboard:Strong and lightweight, provides excellent structural support.
- Chipboard:Thin and flexible, ideal for creating dividers and compartments.
Ribbons
- Satin:Smooth and elegant, adds a touch of sophistication.
- Grosgrain:Textured and durable, suitable for securing bracelets in place.
- Elastic:Stretchy and versatile, allows for easy bracelet insertion and removal.
Step-by-Step s
To craft a practical and aesthetically pleasing bracelet organizer, follow these comprehensive instructions, meticulously Artikeld to ensure a seamless DIY experience.
Prepare the necessary materials and tools, ensuring you have everything you need before embarking on this creative endeavor. With careful planning and attention to detail, you’ll be well-equipped to create a functional and stylish bracelet organizer that will keep your jewelry organized and tangle-free.
Materials and Tools
- Wooden dowels (1/2 inch diameter, 12 inches long)
- Wooden beads (1 inch diameter, 10 pieces)
- Drill with a 1/2 inch drill bit
- Sandpaper (medium-grit)
- Wood glue
- Clamps
- Paint or stain (optional)
Customization and Design

Unleash your creativity and make this bracelet organizer uniquely yours. Personalize it to match your style, room decor, or the specific bracelets you want to store. Experiment with different design options, embellishments, patterns, and color schemes to create an organizer that truly reflects your taste.
Embellishments and Patterns
Add a touch of glamour to your organizer with embellishments like beads, sequins, or lace. Create intricate patterns using fabric markers, paint, or embroidery thread. Incorporate geometric designs, floral motifs, or even your own artwork to make it a truly one-of-a-kind piece.
Color Schemes
Choose a color scheme that complements your room’s decor or your personal style. Opt for bold and vibrant colors to make a statement or stick to neutral tones for a more subtle look. Consider using contrasting colors to highlight different sections of the organizer or create a visually appealing effect.
Personal Touches, Bracelet organizer diy
Make the organizer even more special by adding personal touches. Embroider your initials, add a meaningful quote or affirmation, or incorporate a photo of a loved one. These small details will turn your bracelet organizer into a cherished keepsake.
Tips and Troubleshooting
To ensure the optimal functionality and longevity of your bracelet organizer, consider these practical tips and troubleshooting advice.
Proper storage and maintenance are crucial for preserving the organizer’s condition. Store it in a cool, dry place, away from direct sunlight or moisture. To maintain its cleanliness, wipe it down occasionally with a soft cloth.
Troubleshooting Common Issues
- Loose or Broken Rods:If the rods become loose, tighten them using a screwdriver or pliers. If they are broken, replace them with similar-sized rods.
- Torn Fabric:If the fabric tears, repair it with a needle and thread or fabric glue. Choose a thread color that matches the fabric for a seamless repair.
- Difficult to Remove Bracelets:To make bracelets easier to remove, use a pair of pliers to gently widen the openings of the rods.
Inspiration and Examples
Explore a diverse collection of DIY bracelet organizers that showcase creativity and functionality. These designs range from simple and practical to elaborate and stylish, inspiring you to craft the perfect storage solution for your precious bracelets.
Delve into online tutorials and resources for additional inspiration. Witness the transformative power of DIY by comparing before-and-after images that demonstrate the remarkable results achieved through these projects.
Online Gallery
- Pinterest: Discover a vast collection of DIY bracelet organizer ideas, showcasing various designs and styles.
- Etsy: Browse handcrafted bracelet organizers made by skilled artisans, offering unique and personalized options.
- YouTube: Find step-by-step tutorials and videos that guide you through the creation process.
Before-and-After Transformations
- Before: Tangled bracelets cluttering drawers or jewelry boxes.
- After: Neatly organized bracelets displayed on a customized organizer, enhancing both functionality and aesthetics.
Final Wrap-Up

Creating your own bracelet organizer diy not only provides a practical solution for storing your jewelry but also allows you to express your creativity and add a personal touch to your space. By following the steps Artikeld in this guide, you can easily craft a functional and stylish organizer that will keep your bracelets organized and tangle-free while complementing your home décor.
General Inquiries
What are the benefits of creating a DIY bracelet organizer?
DIY bracelet organizers offer several benefits, including cost-effectiveness, customization options, durability, and the satisfaction of creating something unique and functional.
What materials do I need to make a DIY bracelet organizer?
The materials required for a DIY bracelet organizer may vary depending on the design and style you choose. However, common materials include fabric, cardboard, ribbons, and embellishments.
How do I customize the design of my DIY bracelet organizer?
You can customize the design of your DIY bracelet organizer by choosing different fabrics, patterns, colors, and embellishments. You can also add personal touches, such as embroidery or painting.